If you’ve heard about the benefits of tissue sampling but aren’t sure where to start, don’t worry—you’re not alone. The good news is, it’s easier than you think. With a few simple steps, you can unlock powerful insights about your crop’s nutrient health and take control of your farm’s productivity. Here’s your step-by-step guide to tissue sampling, from collecting samples to interpreting lab results.
Step 1: Sample at the Right Growth Stage
Timing is crucial. Tissue sampling works best when done at key growth stages. Here’s a brief look at when to sample the most common commodity crops:
- Corn: Sample the leaf opposite the ear during tasseling.
- Soybeans: Sample the newest fully developed trifoliate leaves during the reproductive stage.
- Wheat: Sample the youngest fully developed leaves during tillering or boot stage.
The goal is to choose a time when nutrient uptake reflects the plant’s current health and productivity.
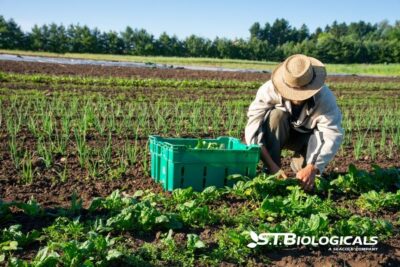
Step 2: Collect the Correct Plant Parts
Accuracy matters. Different crops require sampling from specific parts. For example, you’ll focus on the youngest mature leaves for most crops. Not sure what to sample? We can guide you on which parts to collect for your specific crop.
Step 3: Avoid Contamination
Use clean tools and place samples in paper bags, not plastic. Plastic can cause samples to sweat and degrade, affecting results. Label bags with details like field location and growth stage to avoid mix-ups at the lab.
Step 4: Send Samples to the Lab
Choose a reliable lab that specializes in tissue analysis. Include notes about the crop, growth stage, and any issues you’ve observed in the field. The more context you provide, the better the lab can interpret your results.
Step 5: Read the Results and Take Action
Lab reports will show nutrient levels and identify deficiencies or imbalances. This is where the magic happens. With tissue sampling, you can:
- Spot hidden hunger early.
- Tailor fertilizer or foliar applications to address specific needs.
- Improve efficiency and save money by targeting only the nutrients your crops lack.
Not sure how to interpret the data? That’s where we come in. We’ll help you understand your lab results and create a nutrient management plan that works for you.
Step 6: Pair Tissue Sampling with Soil Testing
For maximum impact, tissue sampling works best when combined with soil testing. If tissue analysis reveals deficiencies, soil tests can help pinpoint the cause, like low nutrient availability or poor soil conditions. Together, these tools give you a complete picture of your farm’s nutrient health.
Step 7: Monitor and Adjust
Tissue sampling isn’t a one-time fix. It’s an ongoing process that lets you adjust your nutrient management throughout the growing season. Regular sampling ensures your crops have everything they need to thrive.
Final Thoughts: Your Next Step
Ready to give tissue sampling a try? We’ll walk you through every step of the process, from collecting samples to interpreting lab results and making adjustments. Contact ST Biologicals today to learn how tissue sampling can transform your crop yields and profitability. The sooner you start, the sooner you’ll see results. We’re here to help you succeed. When soil speaks, we listen.